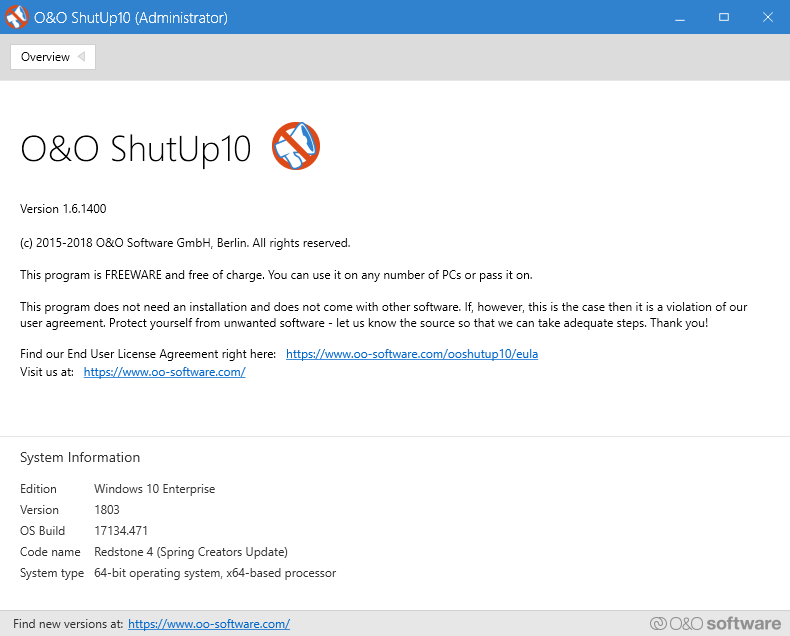
Out of the box Windows 10 is not a NETPRAETOR recommended operating system. However, when paired with OO ShutUp10, a lightweight application made by the reputable software developer O&O Software GmbH.
Windows 10 now becomes a NETPRAETOR acceptable operating system.
I understand that you may have to use Windows 10 for work, entertainment, or outright preference. I’ll be the first to agree that it is the best operating system for certain business needs and PC gaming.
If you are using Windows 10 and also found this website, I’m assuming that you care at least a little, about your online privacy and would like to take steps to improve it.
Well there is great news for you!
The capability to do so does not reside only with hackers and people who have computer science degrees.
You don’t have to go on using Windows 10 everyday thinking you are powerless to limit the data leaking from your operating system like a sinking ship leaks water.
OO ShutUp10 is the solution to using Windows 10 more confidently from a privacy perspective.
There are 4 main reasons you should be running OO ShutUP10 on your Windows 10 computer.
I. Adapt your security settings II. Protect your privacy III. Control locations services IV. Do not pass on your user data and diagnostics
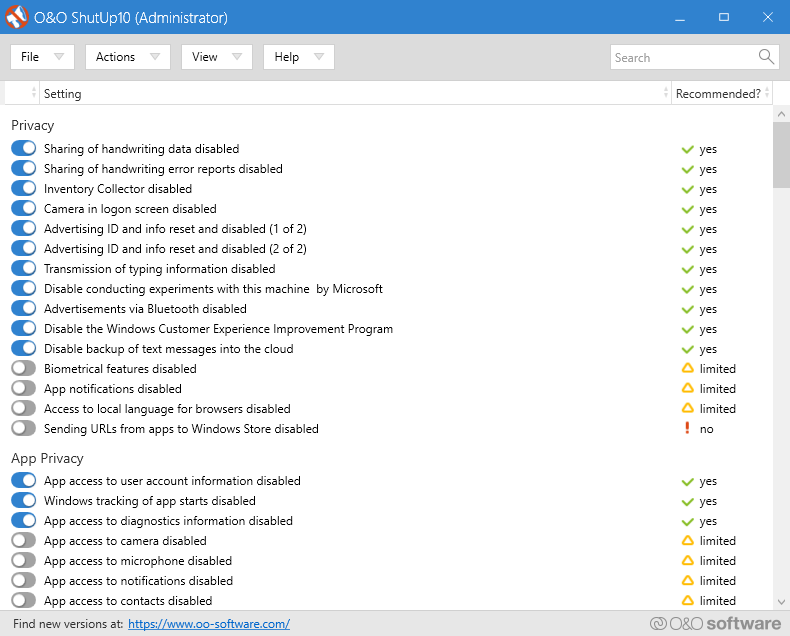
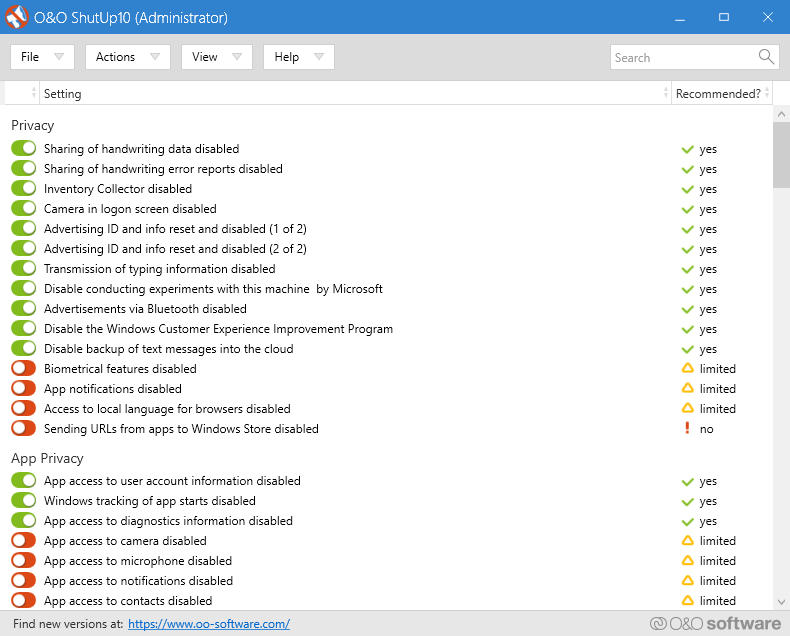
In all, OO ShutUp10 gives you complete control over 160 data points of information leakage simply by toggling on or off.
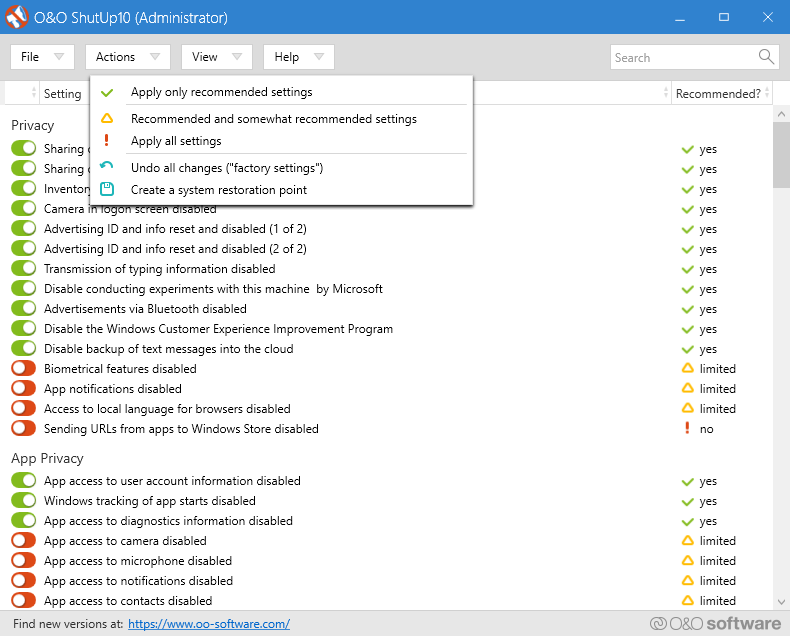
All you have to do is download the OO ShutUp10 Software, open the program (it’s so lightweight it doesn’t even install) and under the actions menu select “Apply only recommended settings”.
It’s that simple.
If you are a privacy enthusiast, I recommend creating a restore point and then go-to-town with the no-less than 160 toggle options.
Happy patching of data leaking holes.
You may be wondering, can I trust the developer O&O Software GmbH and their so called “freeware”?
Well, O&O Software GmbH are the makers of O&O AppBuster. O&O AppBuster is another outstanding tool for uninstalling bloatware and garbage that Microsoft likes to equip default Windows 10 with.
O&O Software GmbH also happen to be one of the few European software companies authorized to provide software delivery to the North Atlantic Treaty Organization (NATO).
You know, that primary defensive pact between the United States and Europe, the longstanding bulwark of the West.
If O&O Software is good enough for NATO, I’m pretty sure it’s also good enough for most individuals and small businesses wanting to shore up their Windows 10 privacy leaks.
I hope you found this information beneficial towards your privacy goals.
If you enjoyed this article, please share or comment your thoughts below!
If you are currently looking for a new home router or small business router, then a Protectli Vault best pfSense hardware could be right for you.
If you are not looking for a new router at this time and are primarily working online from home due to the COVID-19 pandemic I highly recommend you reconsider that decision.
This is especially true if you are using a basic off-the-shelf Linksys or NETGEAR router, or worse yet, using the router and modem provided by your ISP.
Gambling on the above mentioned gear as the cornerstone of your home network or small business network when so much relies upon it, such as work and entertainment, is risking sub-par performance at best and extended periods of downtime at worst.
In 2020 it just dosen’t make sense to be running thousands of dollars in internet connected devices such as laptops, tablets, smart phones, and game consoles to name a few, only to have their functionality reliant upon a $100 piece of cheap plastic provided by your ISP or purchased at BestBuy.
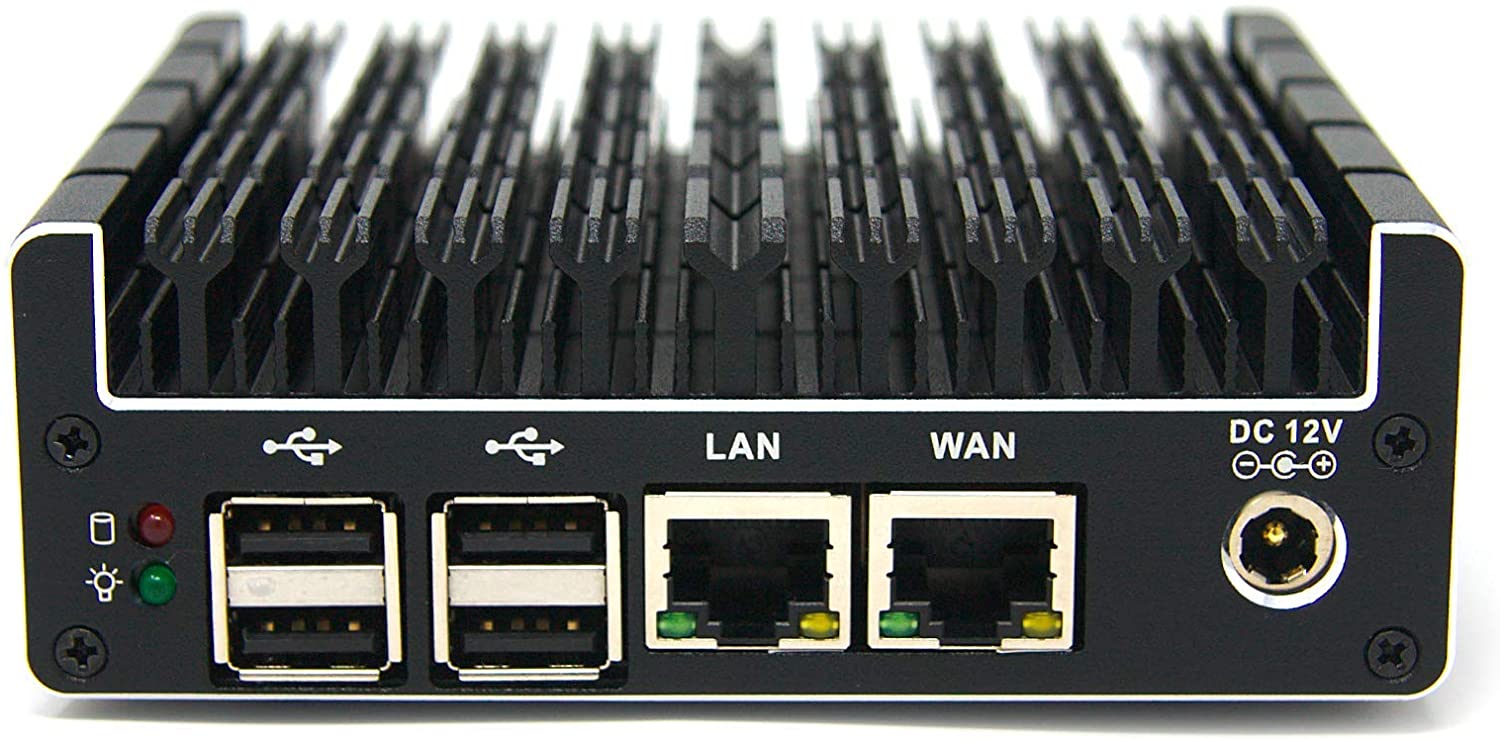
In contrast, when you combine the raw hardware power of the all-metal fan-less Protectli Vault and the open-source software capabilities of pfSense, there is just no comparison to the consumer routers sold by Linksys and NETGEAR, let alone the junk modem and router combinations offered by ISP’s.
There are 5 main reasons a Protectli Vault is the best pfSense hardware and worth upgrading to.
I. Enhanced Secuirty
All Protectli Vault models come with two BIOS options. You can select either the standard AMI (American Megatrends) BIOS or Coreboot BIOS.
The NETPRAETOR recommendation is to select the Coreboot BIOS. Coreboot is open-source and free of back-doors while AMI is closed-source, which means none of us beyond AMI know whats really happening behind the scenes.
A Protectli Vault with Coreboot BIOS is a large factor in being the best pfSense hardware as it allows for a predominantly open-source operating environment.
II. VPN Configurations
The Protectli Vault loaded with pfSense allows you to take your VPN protection to the next level. As the best pfSense hardware you can create a dedicated VPN router that allows all devices on your network to run on a VPN even if they don’t support the native VPN software application.
If you’re data security and data privacy needs demand it, you can also configure a VPN kill-switch. That way, if your VPN connection goes down the Protectli Vault pfSense router will automatically halt all traffic and preventing the exposure of your real IP address.
Most excellent VPN providers offer OpenVPN configurations which is what allows you to setup the Protectli Vault pfSense hardware as a VPN router.
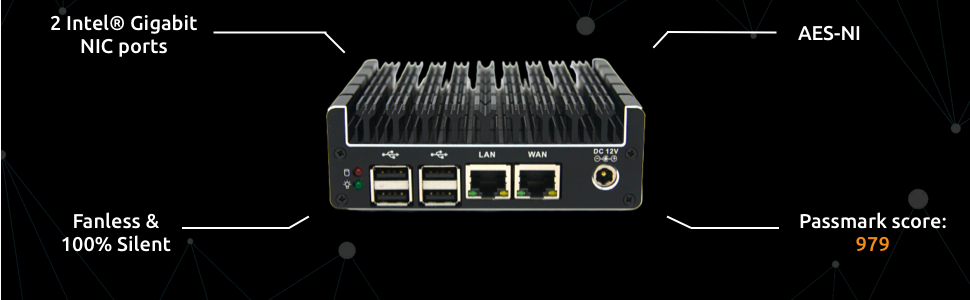
Another powerful feature the Protectli Vault pfSense hardware can leverage is the Intel CPU Advanced Encryption Standard New Instructions (AES-NI) standard which vastly improves the speed of VPN encryption and decryption.
This means that for VPN providers which offer it, you can run much stronger encryption settings than other routers without AES-NI. Non AES-NI routers simply are not be able to process stronger encryption or would experience vastly degraded performance if they did.
III. Network Management
As nice as it is to run a Protectli Vault the best pfSense hardware as a dedicated OpenVPN client, in reality, it dosen’t always play nice with entertainment services such as Netflix and Amazon Prime who will sometimes block VPN traffic.
That is where the Protectli Vault pfSense hardware network management capabilities excel and outperform the competition.
Using either additional ports on the Protectli Vault or VLAN capabilities through pfSense you are able to segment your network traffic so only the devices you would want to run through the VPN do so.
For example if you have an Apple TV or Amazon Firesitck you can omit those from the VPN by creating a separate internal network that routes traffic normally through your ISP.
VPN or not network segmentation is a great practice to improve your networks security, performance, and redundancy.
With VLAN’s for example you can create as many private networks as you need such as one dedicated for work, one for personal computers, and one for smart home devices, and another for guests.
These are all capabilities very much needed in the COVID-19 world yet completely lacking in the offerings from Linksys, NETGEAR, and ISP provided junk.
Finally, Protectli Vault pfSense Hardware easily supports bandwidth speeds up to Gigabit
IV. Failover Capability
For absolutely mission critical needs such as online gaming and Netflix, Protectli Vault pfSense hardware supports the following failover tolerance.
Multi-Wan – This feature provides you the ability to have and additional internet connection. For example, a primary cable internet connection automatically backed up by a secondary cellular connection.
Common Address Redundancy Protocol (CARP) – Allows you to have multiple routers which share a virtual IP address. In case one router goes down then the other router will automatically take over.
V. Support
Both Protectli Vault and pfSense are backed by companies who offer quality support for their respective products. In addition, there is much online documentation for both Protectli Vault and pfSense. Finally, there are a multitude of forums with individuals actively contributing and supporting each other with their Protectli Vault pfSense projects.
Protectli Vault Best pfSense Hardware?
In summary Protectli Vault the best pfSense hardware for home networks and small business networks.
When compared against off-the-shelf routers at a retail store or ISP provided units, the enhanced security, OpenVPN Client, Network Management, Failover, and Support for Protectli Vault pfSense hardware cannot be beat.
Remember, in the COVID-19 era your homes internet connectivity is now just as mission critical as the office you used to work at.
In the sea of browser extensions offering adblocker capabilities with varrying degrees of success, one stands out from the crowd, AdGuard.
AdGuard is primarily an adblocker, however its so much more than a simple browser extension such as uBlock Origin and Privacy Badger.
For example, where those two extensions are purely limited to their selection of compatible browsers, AdGuard software functions at the system level.
This system level functionality expands the protections from a single browser to all traffic on the device, whether that traffic is from another application or browser without an extension.
As a browser agnostic and application agnostic piece of software, it positions AdGuard way ahead of the other adblocker extensions which simply run inside a given web browser.
This definitive guide to the AdGuard adblocker will give you everything to need to know in 2020 regarding its features, benefits, and how to obtain it and install it.
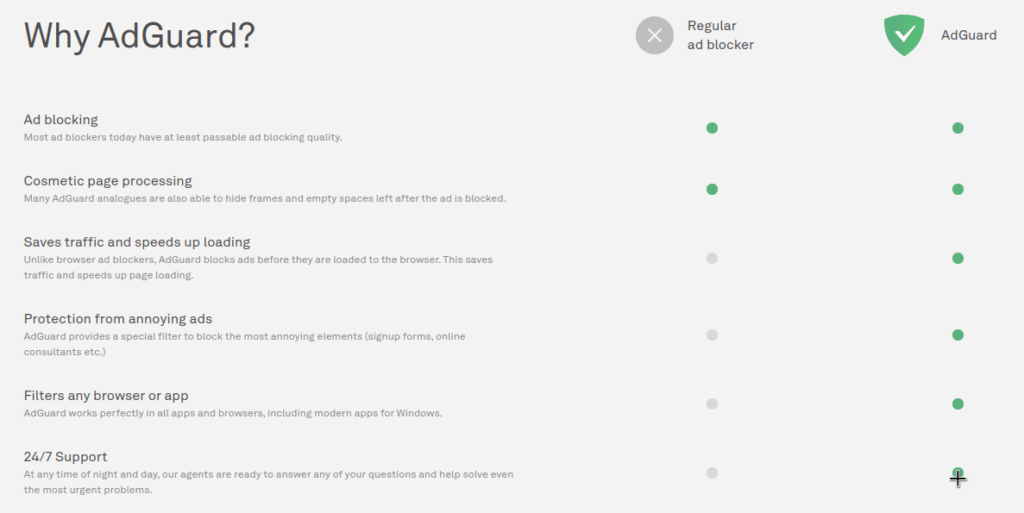
Why use AdGuard as your adblocker?
As mentioned above if your operating system of choice is Windows or MacOS, AdGuard is way more than a simple browser extension. The AdGuard software is a comprehensive solution that addresses four critical categories of data privacy and data security while using the internet.
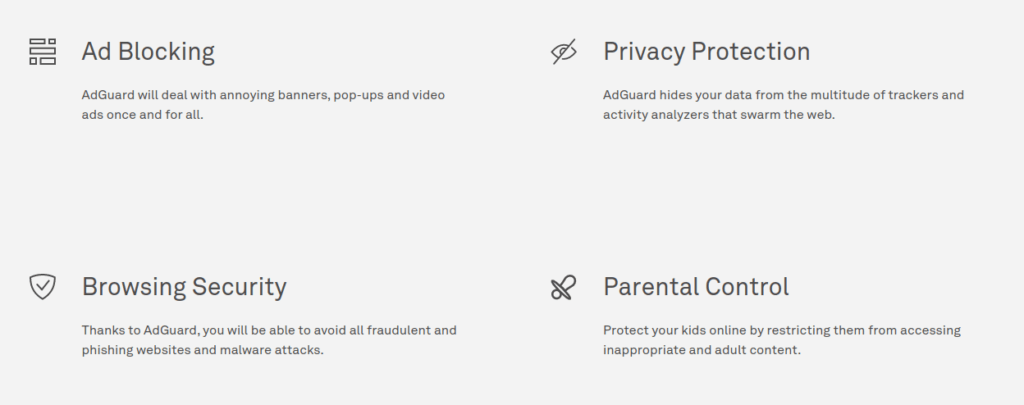
I. Ad Blocking II. Privacy Protection III. Browsing Security IV. Parental Control
Ad Blocking
True to its namesake, AdGuard executes with precision on its primary objective of being an excellent adblocker.
It achieves this by by consistently removing more ads than other adblockers do. The fantastic adblocker ability is not limited to a single browser since the software integrates at the kernel level to provide system wide ad blocking. By default, this integrated service protects all of your other applications as well.
Finally, in the nanoseconds it takes to block annoying ads it not only gives your web browser a speed boost when the ads don’t load, it also will clean up the appearance of the web page from the blocked ads.
AdGuard does this in an effort to close the white space left by blocked ads and all this happens faster than you can blink an eye.
Privacy Protection
Given that most internet advertisements include some form of tracking mechanism, another great benefit of the AdGuard adblocker is that it’s automatically nullifying the vast majority of trackers.
Its worth reiterating that as a standalone program, this ad blocking and tracker blocking its happening system-wide and not limited to the browser.
Browsing Security
AdGuard maintains an updated list of known malicious websites propagating malware and phishing scams. AdGuard will automatically block these websites effortlessly without any speical configurations at the browser level.
Additionally, AdGuard maintains a separate list of websites it deems questionable and will warn you prior to visiting.
Parental Control
Even before the COVID-19 pandemic struck, forcing people around the world to change work environments and school environments it was of paramount importance for parents to restrict the internet access available to their children.
Now in a post COVID-19 world parents should be extra vigilent with most learning transitioning from pysical classrooms to predominantly online classes.
If you are a parent AdGuard gives you the tools to establish system level restrictions in order to prevent your children from accessing inappropriate online content.
How to get AdGuard and protect your data and your privacy today?
Since 2009 AdGuard has been designed by a team who values individual privacy rights and seeks to make their software as user friendly as possible.
To that end, it can be downloaded, installed, and operating with a license key in less than 5 minutes.
Whether your operating system is Windows, MacOS, or Android click on what applies to you below to start your download.
After downloading your system installer simply open the AdGuard program in order to purchase your license key and activate.
There are 4 licenses to choose from.
You can pay yearly for a personal plan supporting up to 3 devices
or
You can pay yearly for a family plan supporting up to 9 devices
or
Both the personal plan and the family plan also can also be purchased as a lifetime license.
AdGuard Adblocker: The Definitive Guide
If you care about blocking ads while reaping the benefits of privacy protection, browsing security, and parental controls, then AdGuard is absolutely the adblocker for you.
In less than five minutes you can try it out for yourself and see firsthand the benefits AdGuard has to offer.
Be sure to leave any comments in the section below!
Among the few leading smart home automation kits available Apple HomeKit is most likely the least popular. That unpopularity compared to other smart home kits such as Google Nest and Amazon Alexa however, is not indicative of Apple HomeKit being sub-par.
The more likely reason for less consumer adoption is that individuals are unaware of how to use HomeKit, or they are more drawn to the marketing campaigns of the competition touting their vast numbers of compatible devices. Its no lie that Google Nest kits and Amazon Alexa kits have more devices to choose from.
In reality, having more smart home devices of the same type such as doorbells and cameras is not necessarily an advantage to them. It may sound good, however each compatible device for a given smart home ecosystem is a potential liability and weak link for a compromise of a home network or small business network if not properly vetted.
In contrast, having fewer devices compatible with Apple HomeKit is a sign of the Apple HomeKit stringent standards of security and quality prior to acceptance into the HomeKit ecosystem. Its those high standards which make Apple HomeKit extremely reliable, robust and more secure than the competition.
As mentioned in my previous post on connected car data and inexpensive home automation systems, Apple HomeKit is the only NETPRAETOR recommended home automation system at this time. This post will provide you with information on how to use HomeKit.
I. Hardware Requirements
Understanding how to use HomeKit requires a knowledge of the hardware elements needed to make it work. In this case when learning how to use HomeKit, it is broken down into three main hardware categories.
Hub – This is the brain of Apple HomeKit which synchronizes and processes all of the information inside your home and the cloud. Any AppleTV 4K, newer iPad, or HomePod can be designated the hub of the house.
NETPRAETOR recommends using an AppleTV 4K as the hub due to its ability to be hardwired via an ethernet cable to a router or switch for more reliable network performance and provides the option for more advanced configurations.
Home Controller – This is the nerve center of Apple HomeKit which sends commands to the various smart home devices.
The Home controller application is your personal iPhone or iPadthat you use on a daily basis. The HomeKit app is already built into your device and simply titled “Home”. If you have never opened it before it will prompt you to add your home when you do.
HomeKit Compatible Smart Devices – This is the body of the Apple HomeKit system made up of all the smart home devcies which execute the commands from the Home controller and processed by the hub.i.e. Turning off and on lights or activating a ceiling fan to work with your thermostat in cooling the home.
As much as the Apple HomeKit competition seeks to distract from how to use HomeKit by their claims of more devices, the devices compatible with Apple HomeKit are are too numerous to list here. You can rest assured though that if a device is Apple HomeKit compatible its one of the best devices on the market for that specific purpose and built to last.
Here are a few NETPRAETOR recommendations to select early when building a new smart home along with how to use HomeKit.
I’ve been using many of these products for 2 years now with absolutely no issues!
Once you have your hub designated, controller identified, and a few Apple HomeKit compatible devices, you are ready for the setup and configuration.
Thankfully, with all the right components present and installed correctly, this process can take less than 30 minutes.
Here is the breakdown on how to setup HomeKit:
Connect the hub device to your home network via ethernet cable or WiFi
Sign-in to the hub with the Apple ID you want to use as the primary
Within the settings of the hub device designate it as the HomeKit hub
Ensure the iPhone or iPad to be used as the controller is also signed-in with the same Apple ID as the hub device
Open the Home application on the iPhone or iPad to be used as the initial controller and add your home to be synced
Pick the first smart device you want to add first and follow the device manufacturer instructions for each device to be added
That’s all there is to it. When wondering how to use HomeKit the most daunting part is not usually the setup and configuration, instead it tends to be the analysis paralysis wondering where to start with all the options to choose from.
I went through that myself when learning how to use HomeKit and that is why I’ve made this post for you.
III. Sharing Access
This is the fun, part. Sharing access to those whom you designate can be a rewarding experience when teaching them how to use HomeKit, especially if it’s their first time getting the “keys” to a fully functional smart house.
Adding people is as simple as opening the Home application on your iPhone or iPad and tapping the home icon in the top left of the screen above your homes name.
From there a new window will open and all you need to do is type in the Apple ID of the people you want to grant access to your home devices.
As people you invite to Apple HomeKit accept the invitation, their names will appear on the screen that pops up after tapping the small home icon above your homes name on the primary screen.
Tapping their name will allow you to edit their permissions such as permitting them to add or remove accessories, or view camera live streams but not prior recordings.
From that point the sky is the limit on how your configure your system and continue to expand it.
How To Use HomeKit?
You just read about how to use HomeKit, the only NETPRAETOR recommended home automation solution at this time.
In terms of simplicity and security, this system is the best on the market with unique features such as Apple Secure Home Video and there are three main elements to consider when learning how to use HomeKit.
I. Hardware Requirements Hub –AppleTV 4k is the best HomeApp Controller – iPhone or iPad HomeKit Compatible Devices – Contrary to what the Apple HomeKit competition says, there are many high quality devices to choose from
II. Setup and Configuration Setting up the Hub and adding devices can take place in as few as six easy steps and under 30 minutes to complete.
III. Sharing Access Enjoying the fruits of your labor with family and friends
Good luck with building your Apple HomeKit and leave any feedback in the comments field below!
With the Holiday season and 2019 quickly coming to a close, many people may be starting the new year and new decade with a shiny new Apple Watch Series 5. These useful little devices are essentially an extension of the iPhone’s they get paired to.
They also have their own apple watch privacy settings.
Like their iPhone siblings, the Apple Watche shares similar strengths and weaknesses concerning how effective they are at protecting data privacy and ensuring data security. The main weakness of the Apple Watch Series 5 ultimately lies with the owner and how they configure it, and maintain it.
Learn how to protect your data privacy and data security with while wearing an Apple Watch by using the most effective privacy settings.
A recent Forbes magazine article gives some good tips on how to secure a new Apple Watch Series 5 by configuring the apple watch privacy settings for maximum privacy and security.
We use cookies to ensure that we give you the best experience on our website. If you continue to use this site we will assume that you are happy with it.